 Lumalien
PROBE LX-3
An open-source, 3D-printed Raspberry Pi 5 robot you build yourself. A DIY rover with a camera, a distance sensor, a twist-lock dome and room for a lidar.
Free
Open-source hardware under CC BY-SA 4.0. You supply the parts, the filament and the software.
A rover you print, build and own
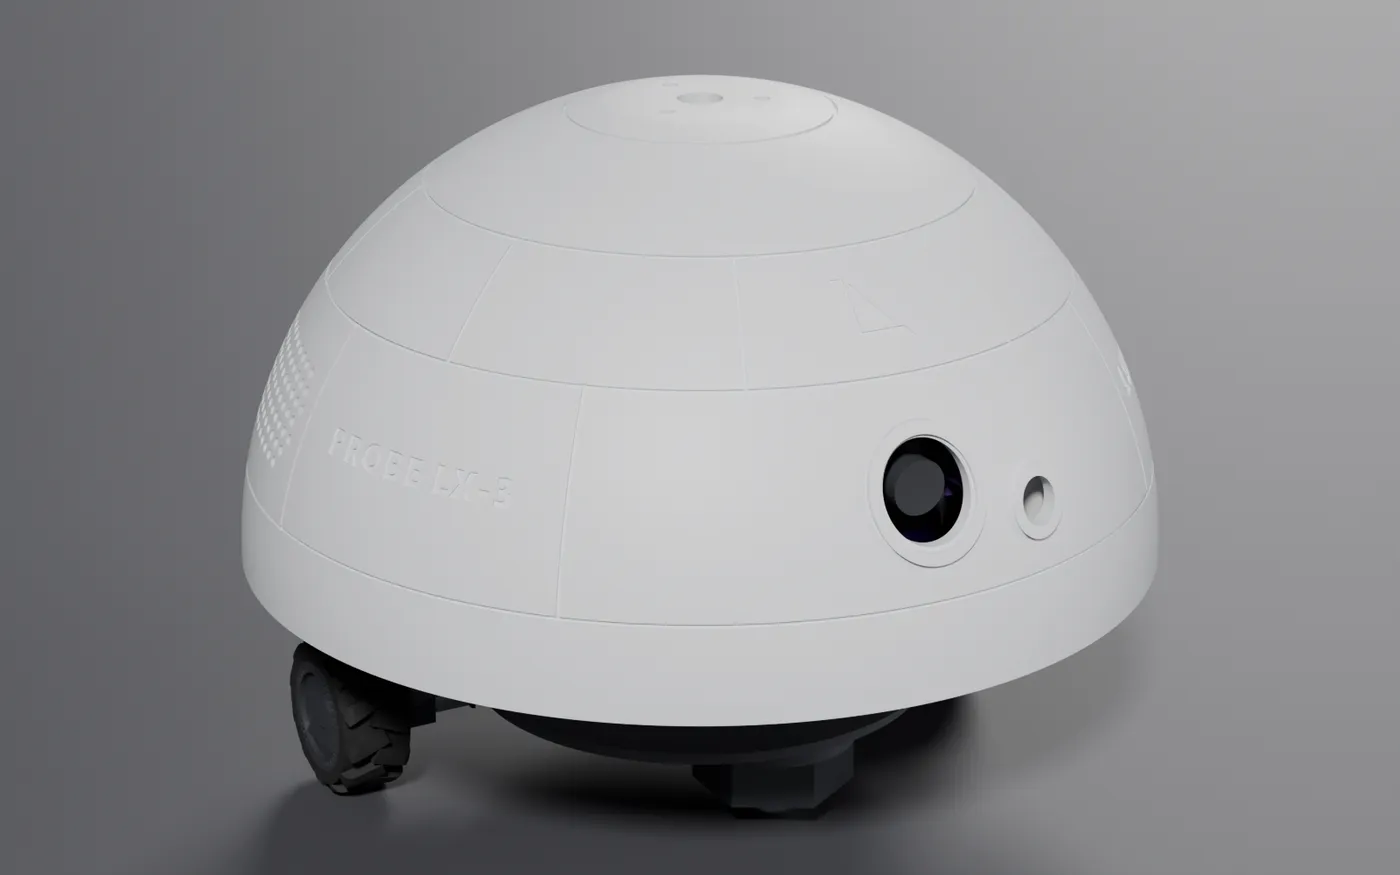
PROBE LX-3 is a small differential-drive robot: a 245 mm dome on a 209 mm base, two N20 motors at the rear, and a ball caster up front. Inside is a Raspberry Pi 5 on a Geekworm X1200 UPS, an Adafruit motor bonnet, a USB camera and a VL53L1X distance sensor.
The dome twist-locks onto the base, so the electronics are one quarter-turn away. It is ready for a spinning lidar on top and a stereo speaker setup inside, with no reprints.
It is free. The design files, STLs, renders and docs are published under CC BY-SA 4.0. Build it, sell it, modify it and share it. Credit Lumalien and share your changes under the same license.
Specs
- Size
- 245 mm across, about 186 mm tall without the lidar
- Drive
- Differential: two N20 gear motors, plain or encoder, and a front ball caster
- Compute
- Raspberry Pi 5. 2 GB is enough
- Power
- Two 18650 cells on a Geekworm X1200 UPS for the Pi. Four AA cells for the motors
- Sensors
- Arducam B0385 USB camera and a CQRobot VL53L1X time-of-flight sensor
- Motor driver
- Adafruit 4280 DC and stepper motor bonnet over I2C
- Printed parts
- Seven core parts plus one optional, all printed with no supports
- Printer
- 256 by 256 mm bed minimum. Designed on a Bambu Lab A1
- Add-ons
- RPLIDAR A1M8 on top. Waveshare WM8960 audio HAT and two speakers inside. No reprint
Hardware only. No software ships with it: you get a robot with a camera, a range sensor, two drive motors and a Pi 5, and you write the software you need.
Build it in four steps
Each step is a document in the repository, written for a first build. Nothing is hidden behind a download.
Buy the parts
The bill of materials lists the electronics, the motion parts, every screw and the tools, with the exact parts the design was fit-checked around.
Print the parts
Eight STLs, each with its orientation on the bed and suggested slicer settings. One spool of PLA or PETG covers every rigid part, plus a little TPU for the tyres.
Assemble
A 13-step guide from test-fitting the shells to closing the dome. It is about an afternoon's work.
Wire it and check it
Every connection, the I2C address map, and a checklist to run before the first power-on.
Eight parts, no supports
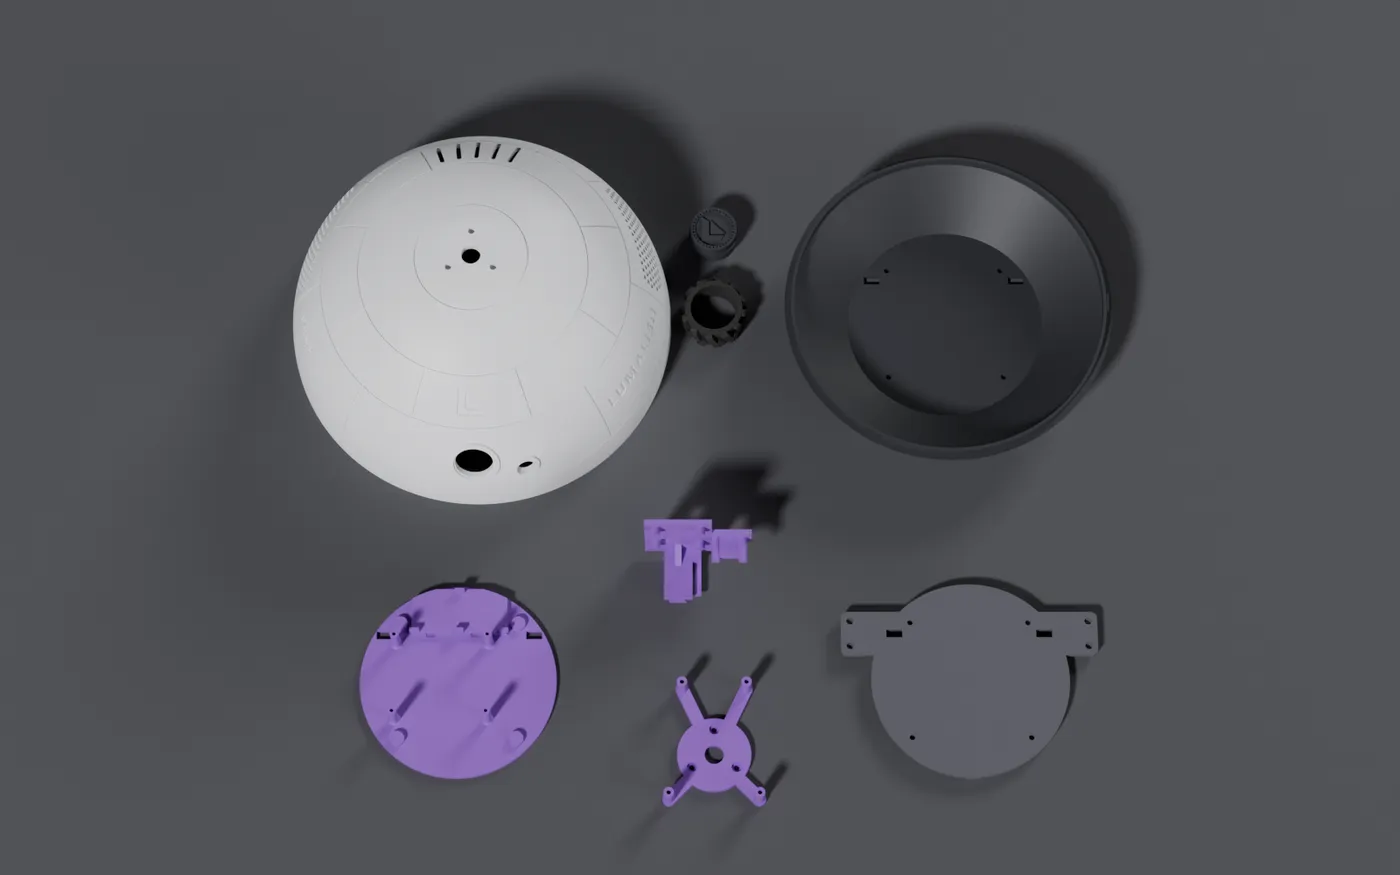
Every part has 3 mm walls and prints without supports. The dome needs a 256 mm bed. Everything else fits a 220 mm one. One spool covers the rigid parts, and the tyres take a small amount of TPU.
Dome
244.8 by 120 mm
Prints rim down. Needs the full 256 mm bed.
Base
209.4 by 41.5 mm
Plain shell with 49 degree walls, floor down.
Electronics tray
123 by 26 mm
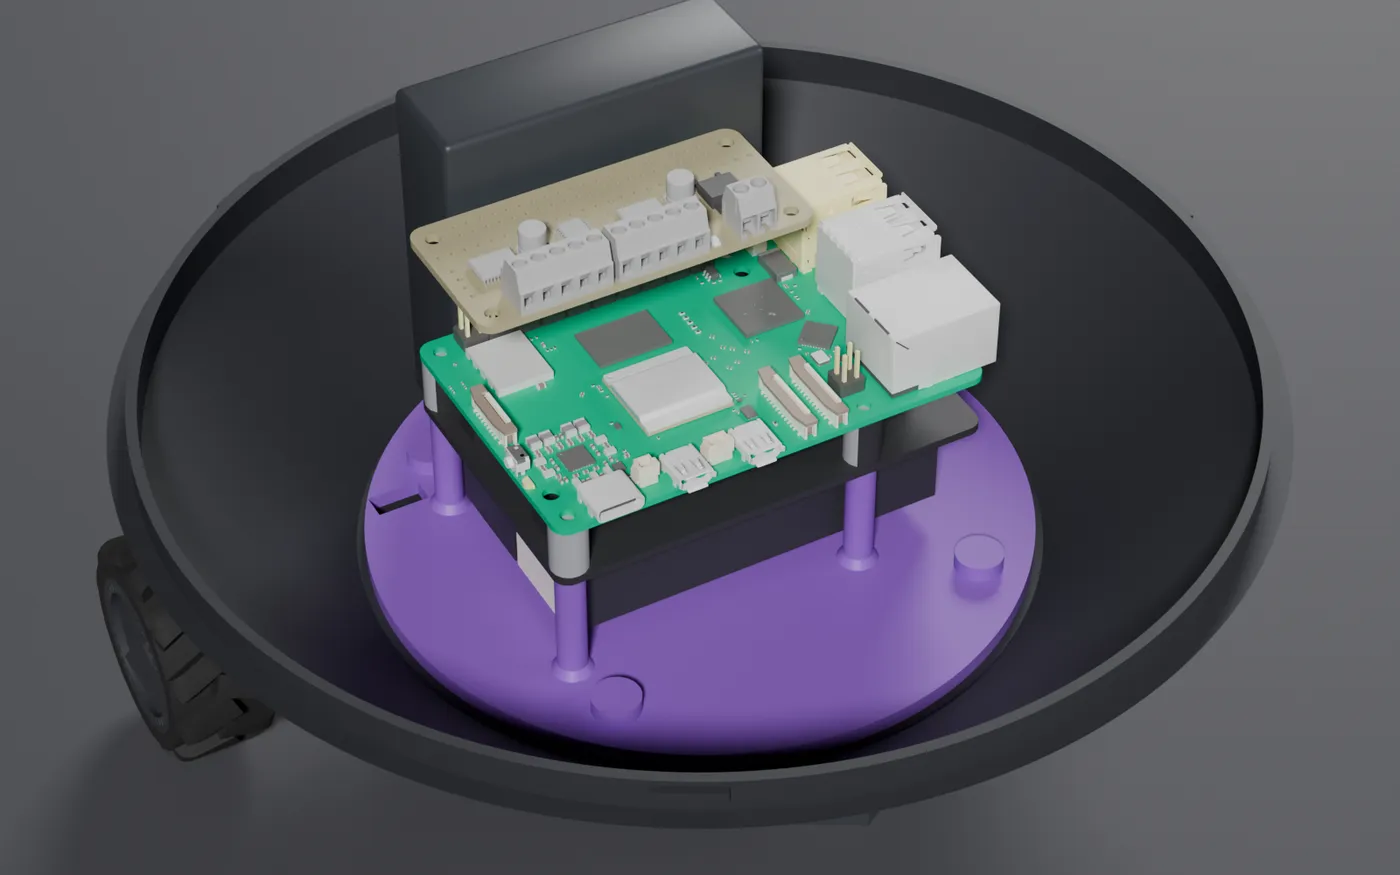
Carries the Pi 5 posts and the AA cradle. Reprint this, not the base, for new electronics.
Drive plate
161 by 124 by 7.5 mm
Nut pockets face the bed, the caster pad faces up.
Camera bracket
67 by 61 by 35.6 mm
Holds the camera and distance sensor and clicks into the dome's rail.
Wheel hub, two
31.8 by 19 mm
PLA or PETG. The D-bore presses onto the N20 shaft.
Wheel tyre, two
43 by 19 mm
TPU. Stretches over the hub.
Lidar adapter, optional
64 by 78 by 21.7 mm
Only for the RPLIDAR add-on.
Not in the download
Room to grow, with no reprint
The dome already has the mounting holes, the grilles and the zip-tie loops for the add-ons below. Fit them the day you build it, or years later.
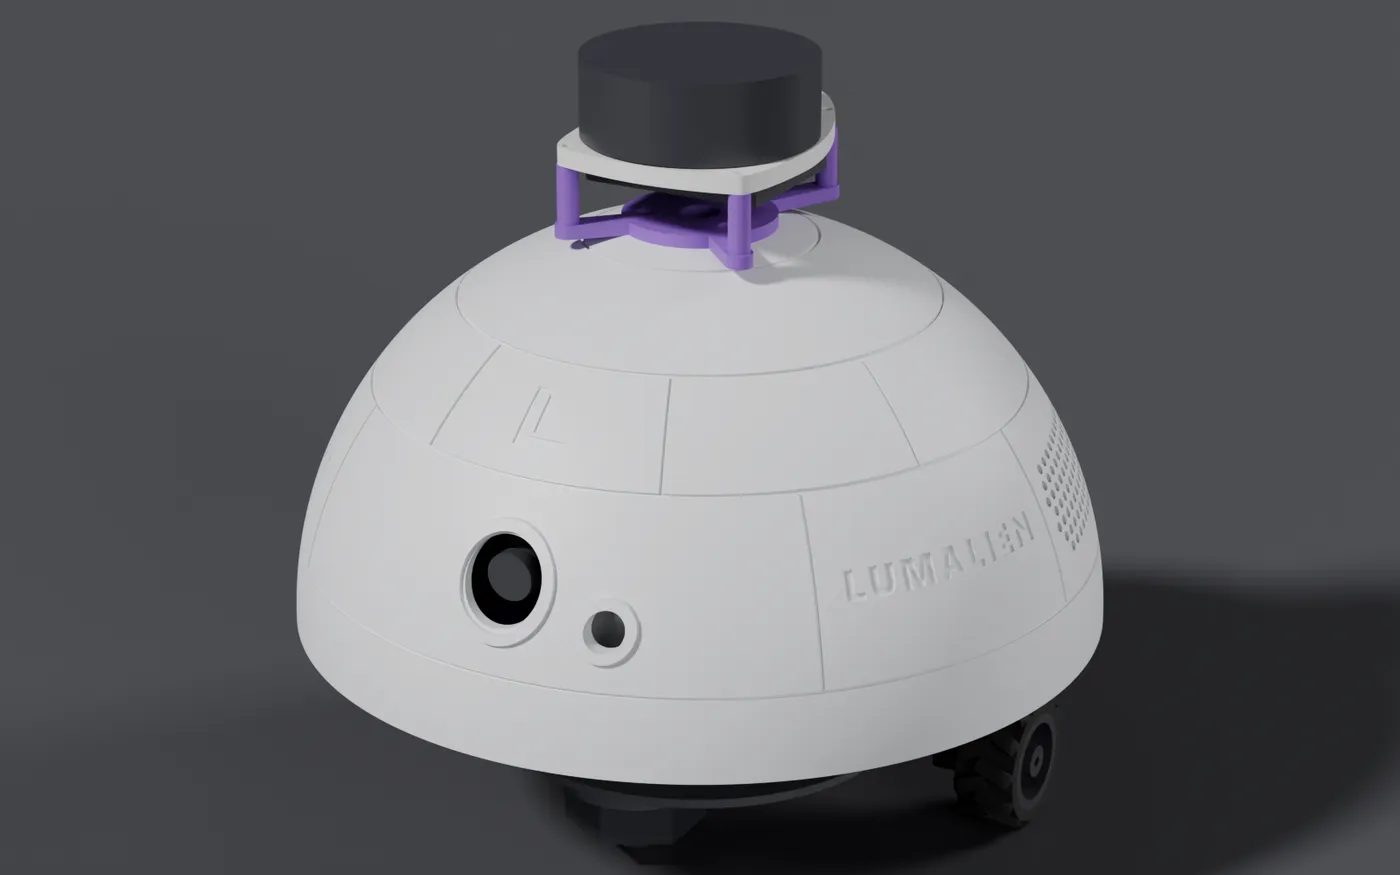
Lidar on top
A SLAMTEC RPLIDAR A1M8 bolts to the dome's flat top through the optional printed adapter. Three inserts, three screws, and the cable drops through the centre hole.
Speakers inside
A Waveshare WM8960 audio HAT with built-in mics, and two 5 W speakers zip-tied over the grilles already in the dome.
An AI accelerator
The Raspberry Pi AI HAT+ 2 fits in the stack with no reprint and runs small language models in its own 8 GB, which suits a 2 GB Pi 5.
Everything is one quarter-turn away
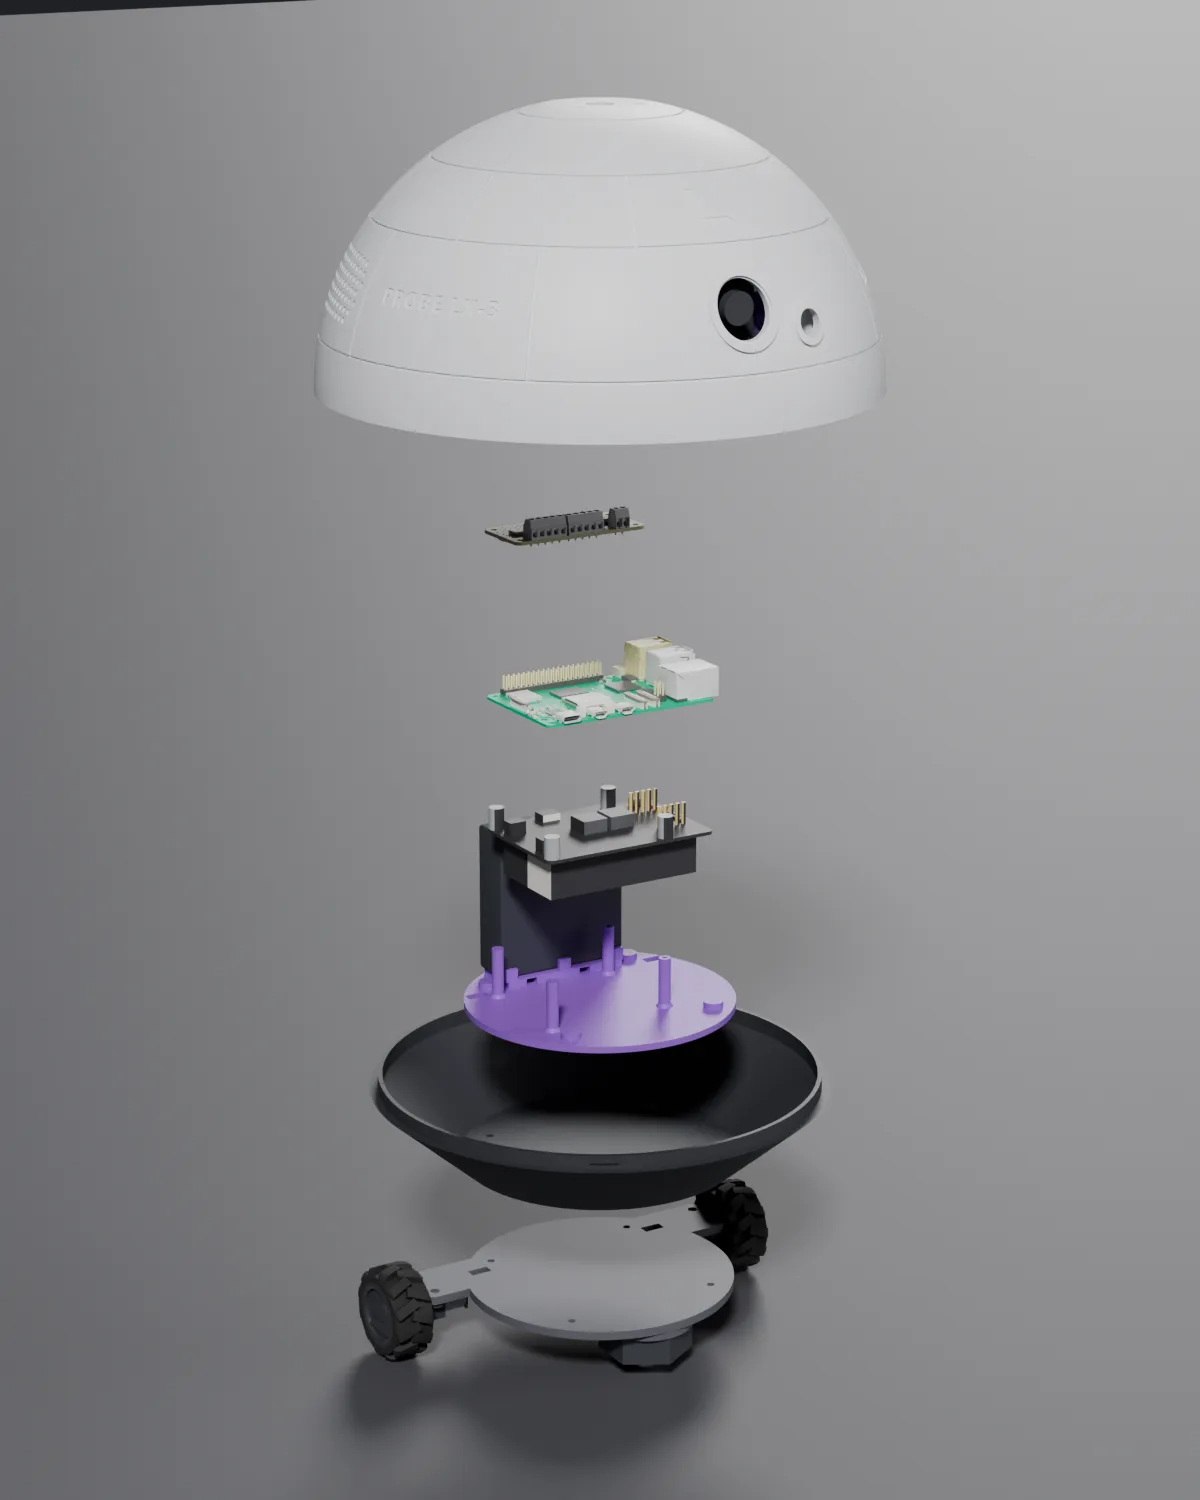
From the top: the dome with its camera bracket, the motor bonnet, the Raspberry Pi 5 on its UPS, the purple electronics tray, the base, and the drive plate carrying the motors, the wheels and the caster.
The tray is the part to reprint when the electronics change. The base, the dome and the drive plate stay as they are, so a remix is one file, not a new robot. The full Blender model with every bought part in it is in the repository, for fit checks before you print.
Build one, and show us.
The release has the STLs and the PDF manual. Build logs, photos, remixes and fixes are welcome, and if you write software for it, share it and we will list it in the repository.
Found it useful?
PROBE LX-3 is free and always will be. If it saved you a design or two, a donation of any size helps fund the next one.
Want a bigger robot? See VISITOR LX-1.